

Table of Contents
- What Makes a Teacake Different from a Sugar Cookie?
- The Story Behind Traditional Southern Teacakes
- How to Make Old Fashioned Tea Cakes: A Simple Method
- Baking Tips for Beginners: Getting That Soft, Buttery Texture
- Family-Friendly Baking Activities with Traditional Teacake Recipes
- Easy Adaptations: Gluten-Free and Dairy-Free Teacakes
- How to Store and Freeze Your Teacakes
- Conclusion: It's All in the Mix
- Frequently Asked Questions
Last Updated: September 8, 2026
Traditional teacake recipes for families are more than just baking instructions; they are a bridge between generations, carrying the warmth of Southern kitchens into your home. At Lura's Kitchen, we believe a teacake is a soft, subtly spiced cookie that invites everyone to the table.

What Makes a Teacake Different from a Sugar Cookie?
Old fashioned tea cakes are a Southern classic that predates the modern sugar cookie, offering a denser, more tender crumb with a gentle hint of nutmeg and vanilla. While a sugar cookie is often crisp and heavily decorated, a traditional teacake is softer, slightly puffier, and less sweet.
The texture comes down to ingredients and method. Teacakes rely on the creaming method, where room temperature butter and sugar are beaten until light and fluffy. They typically use buttermilk for a subtle tang and nutmeg for warmth. The result is a cookie with crisp edges and a soft, almost cake-like center.
The Story Behind Traditional Southern Teacakes
These vintage recipes carry a deep sense of nostalgia, often passed down as an heirloom recipe from grandmothers and great-aunts. Historically, teacakes were a practical way to use pantry staples like flour, butter, and sugar to create a special treat without elaborate ingredients or tools, and were a staple at church gatherings, family reunions, and quiet afternoons on the porch.
This comfort food is rooted in resourcefulness and community, meant to be shared by everyone, from the youngest child to the eldest elder.
How to Make Old Fashioned Tea Cakes: A Simple Method
The best way to ensure success with old fashioned tea cakes is to start with a reliable mix that handles the science of the dough for you, but the method remains wonderfully simple.
Here is a simple method that yields a perfect batch:
- Prep Your Workspace: Preheat your oven to 350°F and line a baking sheet with parchment paper.
- Cream the Butter: In a large bowl, beat room temperature butter and sugar until the mixture is pale and fluffy. This step is key for a tender crumb.
- Add Wet Ingredients: Mix in a large egg and your vanilla extract until well combined.
- Combine Dry Ingredients: In a separate bowl, whisk together your flour mix, baking soda, and a pinch of nutmeg if desired.
- Form the Dough: Gradually add the dry ingredients to the wet mixture, stirring until a soft dough forms. This is the point where you can let the kids help.
- Chill and Roll: Wrap the dough and chill it for at least 30 minutes. A chilled dough is much easier to roll out with a rolling pin and cut with a cookie cutter.
- Bake to Perfection: Roll the dough to about 1/4-inch thickness, cut into rounds, and place them on the prepared baking sheet. Bake for 10-12 minutes, or until the edges are just golden brown.
Baking Tips for Beginners: Getting That Soft, Buttery Texture
Achieving that signature soft texture and buttery flavor comes down to a few key techniques that are easy to master. The most common mistake is overbaking, which turns a tender teacake into a dry biscuit. Pull them from the oven when the edges are set but the centers still look slightly soft.
Another critical tip is to avoid overworking the dough; stop mixing as soon as it comes together, as overmixing develops gluten and leads to a tough cookie. Use high-quality ingredients, such as real butter and pure vanilla extract.
Family-Friendly Baking Activities with Traditional Teacake Recipes
Baking with children is about more than the final cookie; it is a chance to build confidence and create lasting memories. Traditional teacake recipes for families are ideal because they are forgiving and require minimal special equipment. Let kids take charge of fun tasks like whisking dry ingredients or pressing the cookie cutter into the dough.
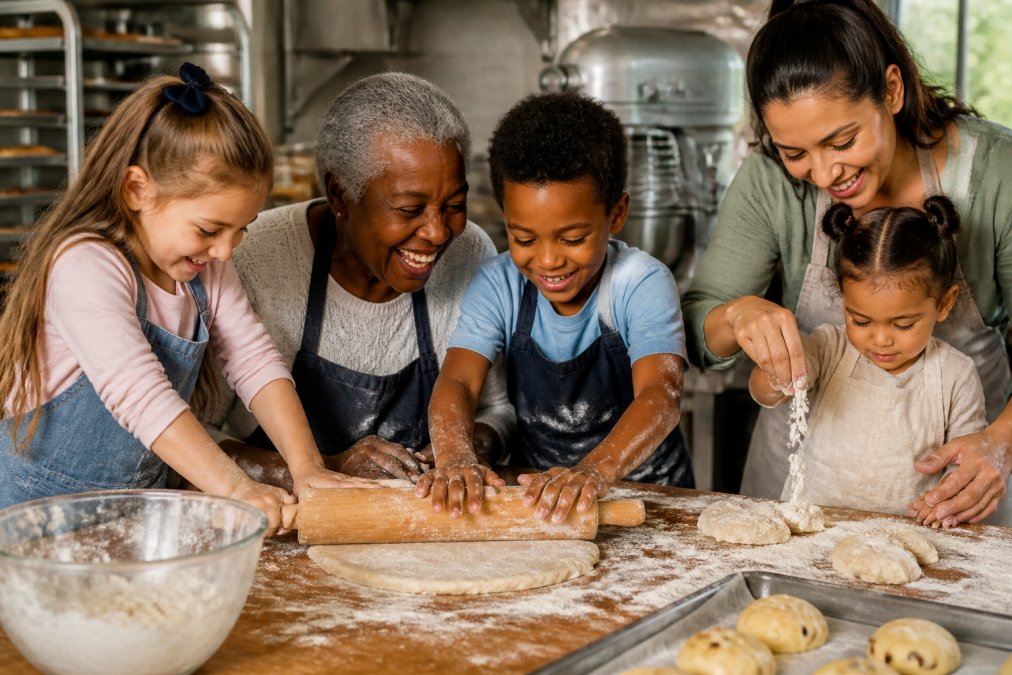
Turn the baking into a mini-lesson on history and heritage, or practice counting and measurements as you scoop the dough. Lura's Kitchen mixes are designed to be mess-free, meaning less cleanup and more time enjoying each other's company.
Turn Teacakes into a Canvas: Decorating Ideas for Kids
While the classic teacake is wonderfully plain, a blank canvas is exactly what young bakers need to express themselves. Here are a few ways to turn your batch into a family art project:
- Simple Icing: Whisk together 1 cup of powdered sugar with 2-3 tablespoons of milk and a splash of vanilla extract. Let the kids drizzle or spread it on cooled teacakes. For a fun twist, divide the icing into small bowls and add a drop of food coloring to each.
- Sprinkle Bar: Set out small bowls of colorful sprinkles, sanding sugar, or even crushed graham crackers. After icing, let the kids dip their teacakes or shake sprinkles on top. This is a great activity for toddlers who love to pour and sprinkle.
- Stencil Fun: For older children, place a doily or a paper stencil over a cooled, iced teacake and dust with cocoa powder or cinnamon. Lift carefully to reveal a delicate pattern.
- Sandwich Cookies: Pair two teacakes with a scoop of vanilla buttercream or a spoonful of jam in the middle for a special treat. This is a great way to use up any broken cookies.
Age-Appropriate Tasks for Little Helpers
Not every task is suited for every age. Here’s a quick guide to keep everyone safe and engaged:
- Ages 2-4: Wiping the counter, adding pre-measured ingredients to the bowl, and using their hands to gently pat the dough.
- Ages 5-7: Whisking dry ingredients, using a plastic or kid-safe cookie cutter, and placing cut dough onto the baking sheet with your help.
- Ages 8-10: Measuring ingredients, rolling the dough with a rolling pin, and using a standard cookie cutter with supervision.
- Ages 11+: Mixing the dough, reading the recipe aloud, and helping to load and unload the oven with close supervision.
A Troubleshooting Guide for Baking with Kids
Baking with kids is fun, but it can also lead to a few mishaps. Here’s how to handle the most common ones without tears:
- Dough is too sticky: This often happens if little hands have been kneading it too much. Pop the bowl in the fridge for 15-20 minutes to firm it up. You can also lightly flour the rolling surface and the rolling pin.
- Cookies spread too thin: If the dough wasn't chilled long enough, or if the baking sheet was warm, the cookies will spread. Make sure to chill the dough for at least 30 minutes and use a cool, parchment-lined sheet for each batch.
- Uneven shapes: This is part of the charm of baking with kids! If you want more uniform cookies, re-roll the scraps only once. Over-rolling the dough will make it tough.
- Burnt bottoms: If the bottoms are browning too quickly, your oven might be running hot. Try placing a second baking sheet underneath the one you're using to insulate it.
Easy Adaptations: Gluten-Free and Dairy-Free Teacakes
Families with dietary restrictions don't have to miss out on this nostalgic treat, as you can easily adapt teacake recipes for gluten-free or dairy-free diets. For a gluten-free version, use a 1:1 gluten-free all-purpose flour blend containing xanthan gum.
For dairy-free adaptations, replace the butter with a high-quality plant-based butter formulated for baking. These sticks often contain extra water or oil, so chilling the dough is even more important. Swap the buttermilk for dairy-free milk mixed with a teaspoon of lemon juice or vinegar.
The Science of the Swap: Why It Works
Understanding the 'why' behind these substitutions is the secret to success. Here's what each ingredient does and how to replace it:
- Gluten-Free Flour: Gluten provides structure and elasticity. A good 1:1 blend with xanthan gum replicates this by creating a sticky network that traps air and holds the dough together. Without it, your teacakes will be crumbly and dense. Look for a blend that includes rice flour, tapioca starch, and potato starch for the best results.
- Plant-Based Butter: Butter is about 80% fat and 20% water. Plant-based butters vary widely. Some are excellent for baking, while others are too soft. Look for sticks that are specifically labeled for baking and have a fat content similar to dairy butter. If your dough seems too soft, chill it for an extra 15-20 minutes.
- Dairy-Free Buttermilk: Buttermilk adds tang and activates the baking soda, which helps the teacakes rise. To make a quick substitute, add 1 tablespoon of lemon juice or white vinegar to a 1-cup measuring cup, then fill the rest with your favorite unsweetened dairy-free milk (like almond, oat, or soy). Let it sit for 5 minutes to curdle before using.
A Simple Gluten-Free & Dairy-Free Teacake Recipe
Ingredients:
- 1/2 cup (1 stick) dairy-free butter, softened
- 1 cup granulated sugar
- 1 large egg (or 1 flax egg for a vegan option: 1 tbsp ground flaxseed mixed with 3 tbsp water, let sit for 5 minutes)
- 1 teaspoon vanilla extract
- 2 cups 1:1 gluten-free all-purpose flour blend (with xanthan gum)
- 1/2 teaspoon baking soda
- 1/2 teaspoon ground nutmeg
- 1/4 cup dairy-free buttermilk (see above)
Instructions:
- Cream the Butter: In a large bowl, beat the softened dairy-free butter and sugar together until light and fluffy. This may take a little longer than with dairy butter, so be patient.
- Add Wet Ingredients: Beat in the egg (or flax egg) and vanilla extract until well combined.
- Combine Dry Ingredients: In a separate bowl, whisk together the gluten-free flour, baking soda, and nutmeg.
- Form the Dough: Gradually add the dry ingredients to the wet mixture, alternating with the dairy-free buttermilk, starting and ending with the dry ingredients. Mix until just combined. The dough will be soft.
- Chill the Dough: This step is crucial. Wrap the dough in plastic wrap and chill for at least 1 hour, or up to 2 hours. This prevents spreading and makes the dough easier to handle.
- Bake: Preheat your oven to 350°F. Roll the dough to 1/4-inch thickness on a lightly floured surface. Cut into rounds and place on a parchment-lined baking sheet. Bake for 10-12 minutes, until the edges are just set and lightly golden.
- Cool: Let the teacakes cool on the baking sheet for 5 minutes before transferring them to a wire rack to cool completely.
Troubleshooting Your Adaptations
- Teacakes are too crumbly: This usually means your flour blend doesn't have enough xanthan gum, or the dough was over-mixed. Try adding 1/4 teaspoon more xanthan gum to your dry ingredients next time.
- Teacakes spread too much: Your plant-based butter may be too soft. Make sure it's softened but not melted, and don't skip the chilling step. You can also try adding an extra 1/4 cup of flour to the dough.
- Teacakes are gummy: This can happen with some gluten-free flours. Try baking them for a minute or two longer, and make sure they are completely cool before storing them in an airtight container.
These adaptations are designed to be forgiving and family-friendly. By understanding the role of each ingredient, you can confidently create a batch of teacakes that everyone, regardless of dietary needs, can enjoy together.
How to Store and Freeze Your Teacakes
To keep your teacakes soft and fresh, store them in an airtight container at room temperature, where they will maintain quality for up to a week. The airtight seal is crucial for preventing them from drying out.
For longer storage, freezing is an excellent option. Freeze baked teacakes in a single layer on a baking sheet, then transfer to a freezer-safe bag for up to three months. A more convenient method is to freeze the dough itself: shape it into a log, wrap tightly, and freeze. When a craving hits, slice off what you need and bake straight from the freezer.
Conclusion: It's All in the Mix
Baking traditional teacake recipes for families is a wonderful way to slow down and connect with the ones you love. The process of mixing, rolling, and baking brings a sense of accomplishment and joy that store-bought cookies simply cannot match.
At Lura's Kitchen, we've captured that heritage in a box so you can focus on the fun, not the fuss. Using our premium Lura's Kitchen mix, you can create soft, buttery, nostalgic teacakes with minimal effort, leaving more time to make memories with the family. With our multi-generational, woman-majority, and minority-owned benefit corporation, you are not just baking a dessert; you are supporting a mission to share sweet memories. It's all in the mix, and we invite you to experience the love baked into every batch. Get started with Lura's Kitchen and share the tradition of Southern baking with your family today.
Frequently Asked Questions
What is the best way to get a soft texture in traditional teacake recipes?
The key to soft teacakes is to avoid overworking the dough and to pull them from the oven when the edges are just golden brown. Using room temperature butter and chilling the dough for at least 30 minutes before rolling also helps create a tender crumb. Remember, they will continue to set as they cool on the baking sheet.
Can I use these teacake recipes for a family-friendly baking activity?
Absolutely. Teacakes are perfect for baking with kids. Let younger children help whisk dry ingredients or press cookie cutters into the chilled dough. Older kids can measure ingredients and brush the tops with butter. The simple steps and forgiving dough make it a rewarding project for all ages, creating sweet food memories.
What are some easy adaptations for dietary restrictions?
For a gluten-free version, swap the all-purpose flour for a 1:1 gluten-free baking blend. To make them dairy-free, use a high-quality vegan butter substitute. The dough might need an extra 10 minutes of chilling to firm up. These simple swaps allow everyone in the family to enjoy this Southern classic.
How are tea cakes different from a standard sugar cookie?
While both are rolled cookies, teacakes have a softer, more tender crumb and a less sweet flavor profile. They often include buttermilk or nutmeg, which gives them a unique, nostalgic taste that sets them apart from a typical sugar cookie. This makes them a perfect comfort food with a vintage recipe appeal.