
Table of Contents
- Why a Dedicated Toddler Baking Station Makes Baking Together Easier
- Step 1: Assess Your Space and Declutter Existing Kitchen Storage
- Step 2: Organize Baking Supplies by Category and Designate a Baking Station
- Step 3: Baking Station Storage Ideas That Work for Toddler Height
- Step 5: Set Up Safe Kitchen Tasks for Toddlers and Supervision
- Step 6: Label Everything and Keep the Station Tidy
- Small-Space and Portable Baking Station Options
- Frequently Asked Questions
Last Updated: October 6, 2026
Why a Dedicated Toddler Baking Station Makes Baking Together Easier
A toddler baking station transforms messy kitchen moments into joyful memories. 🎉 At Lura's Kitchen, we know that baking with little ones doesn't have to feel chaotic.
The magic happens when toddlers feel like real bakers. They reach for their own flour. They grab a mixing spoon without asking.
A proper baking station does more than just organize supplies. It builds confidence. It makes cleanup easier.
Step 1: Assess Your Space and Declutter Existing Kitchen Storage
Before you build anything, look at what you actually have. Open your cabinets and pantry. Pull out every baking item, the old mixes, the dented pans, the tools you haven't touched in years.
Be honest about what stays and what goes. 🧹
Declutter ruthlessly:
- Expired baking mixes (check dates on boxes)
- Broken utensils or bent baking sheets
- Duplicate tools (do you really need three spatulas?)
Once you've cleared space, you'll see exactly what your toddler needs access to. You'll also know how much room you actually have for a baking station.
Step 2: Organize Baking Supplies by Category and Designate a Baking Station
Group supplies by type
Organizing baking supplies by category makes everything easier to find, for you and for your toddler. When similar items live together, your child learns where things belong.
Group your supplies this way:
- Dry ingredients: All-purpose flour, sugar, baking powder, baking soda (in sealed containers)
- Mixes and packaged items: Cookie mixes, cake mixes, pancake mixes (like our Langston's No-Nonsense Chocolate Chip or Tura Lura's Chocolate Chip Pecan)
- Decorating supplies: Sprinkles, food coloring, frosting (in a separate bin)
- Frequently used tools: Mixing bowls, wooden spoons, measuring cups, whisks
Grouping supplies by category means your toddler can grab everything they need for one task without wandering the kitchen. It also teaches them how to organize and think logically about their baking project.


Choose your station location
Your baking station location matters. You want a spot where your toddler can work independently while you can still see them.
Best location options:
- A low shelf in your kitchen (18-24 inches high)
- A small cart or rolling station you can wheel out
- A dedicated cabinet with pull-out shelves
- A corner of your counter with a sturdy step stool nearby
Choose a spot away from the stove and hot surfaces. Make sure it's near a window or under good lighting so your toddler can see what they're doing. If you have limited space, a portable cart works beautifully, you can roll it out when it's time to bake and tuck it away after.
Step 3: Baking Station Storage Ideas That Work for Toddler Height
Use pull-out shelves and stackable storage
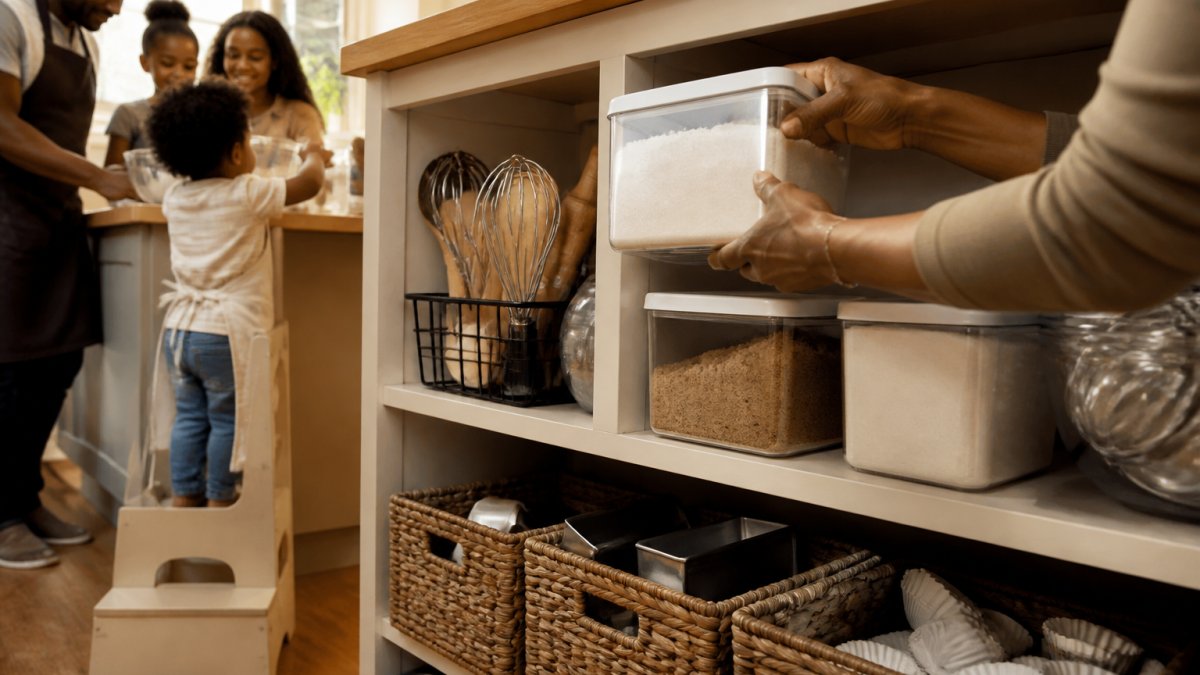
Pull-out shelves are game-changers for toddler baking stations. When everything slides out toward your child, they can reach items without climbing or stretching dangerously.
Smart storage solutions:
- Pull-out sliding shelves in existing cabinets (easy to install)
- Stackable plastic bins that fit on shelves (clear so toddlers can see inside)
- Tiered shelf risers to create more vertical space
- Drawer dividers to keep utensils organized and separated
Stackable storage lets you maximize a small space. Your toddler can reach what they need without your help. Everything stays visible and accessible.
Keep these on hand:
- Baking mixes (our gourmet mixes are perfect, simple, mess-free, and delicious)
- Eggs (store in a low basket; use plastic eggs as practice items)
- Butter (in a small dish, ready to soften)
- Sprinkles and toppings (in small jars with easy-open lids)
Rotate ingredients seasonally. In winter, keep holiday mixes visible. In summer, stock fun sprinkle colors. Keeping the station fresh keeps your toddler interested.
Step 5: Set Up Safe Kitchen Tasks for Toddlers and Supervision
Age-appropriate tasks and a sturdy step stool
Not all baking tasks are safe for toddlers. Knowing which ones are appropriate prevents accidents and frustration.
- Ages 2-3: Pouring (with supervision), sprinkling toppings, pressing buttons on mixers
- Ages 3-4: Measuring dry ingredients, stirring with a wooden spoon, decorating cookies
- Ages 4-5: Cracking eggs (with help), reading recipe cards, operating timers
A sturdy step stool is essential. Your toddler needs to reach the counter safely without climbing on chairs or cabinets. Look for a stool with a wide, stable base and a handle they can hold.
Supervision checklist:
Classic Madear’s Old Fashion Teacake Mix →
- Always stay in the kitchen while your toddler bakes
- Keep hot surfaces (oven, stove) clearly marked and off-limits
- Teach your child to ask before touching anything new
- Use oven mitts yourself when handling hot pans
Allergen management and food hygiene
Toddlers put their hands everywhere. Keeping your baking station clean prevents cross-contamination and keeps everyone safe.
Hygiene essentials:
- Hand-washing station nearby (a step stool by the sink works)
- Paper towels and wipes within reach
- Separate utensils for different ingredients (don't double-dip)
- Labeled containers so you know what's what
If anyone in your family has food allergies, keep allergen-containing items in a separate, clearly labeled section. Teach your toddler which items are for them and which are not.
Step 6: Label Everything and Keep the Station Tidy
Labels transform a baking station from chaotic to functional. They help your toddler learn to read, find what they need, and put things back.
Labeling ideas:
- Picture labels (for pre-readers) showing what's in each container
- Word labels (for emerging readers) with the ingredient name
- Color-coded baskets (red for tools, blue for mixes, green for decorating)
- Laminated cards with simple recipe steps
Make labels big, colorful, and easy to read. Use a label maker or print them at home. Laminate them so they survive sticky fingers and spills.
Keeping it tidy:
- Wipe down surfaces after every baking session
- Return items to their labeled homes immediately
- Empty sprinkle jars that are nearly full (prevents spills)
- Check ingredient dates monthly
A tidy station teaches your child that baking is something you care for.
Small-Space and Portable Baking Station Options
Not everyone has a dedicated pantry or extra cabinet space.
Small-space solutions:
- Rolling cart (fits in a corner or closet; roll out when needed)
- Under-sink organizer (if your cabinet is empty underneath)
- Hanging shoe organizer on a pantry door (pockets hold small tools and mixes)
- Stackable bins that fit on one shelf
Portable stations work beautifully for apartments, small kitchens, or families who move frequently.
Portable station essentials:
- One rolling cart with 2-3 shelves
- Clear containers for dry ingredients
- A small basket for frequently used tools
- Labels that move with the station
The beauty of a portable station is flexibility.
Creating a toddler baking station is about more than organization, it's about giving your child a place where they belong in the kitchen. When you set up a space designed for their height, filled with tools they can use, and stocked with simple mixes like Lura's Kitchen's gourmet blends, baking becomes something they look forward to.
Watch your toddler's face light up when they reach for their own measuring cup.
At Lura's Kitchen, we believe that baking with your family should be simple, fun, and mess-free. Our premium mixes, from Madear's Old Fashion Teacakes to Tura Lura's Chocolate Chip Pecan, are designed for exactly this.

Because at Lura's Kitchen, we know the best ingredient in any recipe is family. It's all in the mix. 🍪
Frequently Asked Questions
What are the most important items to include in a toddler baking supplies checklist?
Start with kid-friendly essentials: plastic mixing bowls, wooden spoons, measuring cups (plastic or metal with easy-grip handles), a small whisk, and a sturdy step stool for counter access. Add aprons sized for toddlers, small mixing tools, and a baking cart if space allows. Stock your favorite baking mixes like Lura's Kitchen options, along with frequently used dry ingredients stored in labeled clear containers. Avoid sharp utensils, heavy cast-iron bakeware, and anything fragile. Include simple tools for measuring and stirring that give toddlers real participation without safety risks.
How do I organize a toddler baking station to maximize easy access and cleanup?
Designate a specific counter space or corner at toddler height, using pull-out shelves or a baking cart to bring supplies within reach. Store frequently used items, mixing bowls, spoons, and baking mixes, on the lowest shelves or in open baskets. Use clear canisters for dry ingredients and labeled containers so your toddler can identify what they need. Place a small mat or towel under the station to contain spills. Keep cleaning supplies (damp cloths, paper towels) nearby for quick tidying between steps. This setup lets toddlers grab what they need while you supervise, making the whole experience less stressful.
What safe kitchen tasks can toddlers help with at a baking station?
Toddlers can pour pre-measured dry ingredients into bowls (with supervision), stir batter with a wooden spoon, place cookie dough on baking sheets with your guidance, and press toppings into dough. They can also help measure ingredients using plastic measuring cups, sprinkle toppings, and wash vegetables or their hands. Avoid tasks involving sharp knives, hot ovens, or heavy lifting. Always supervise closely and keep the station organized so your toddler knows where safe tools are and what they're allowed to touch. These hands-on activities build confidence and create lasting memories of baking together.
How can I keep allergen management simple at a toddler baking station?
Store allergen-containing items (nuts, soy, etc.) in clearly labeled, sealed containers separate from other ingredients. If a family member has allergies, dedicate specific utensils and mixing bowls to allergen-free baking. Wash hands and the work surface thoroughly before starting, and keep allergen-free mixes (like Lura's Kitchen options) in their own section. Teach your toddler which containers are off-limits and why. Wipe down the station after baking to remove crumbs or residue. Simple labeling and separation prevent cross-contamination and keep baking safe and fun for everyone in your household.