

Last Updated: November 9, 2026
Quick Summary
You can decorate gourmet cookies at home with icing, melted chocolate, buttercream, stencils, or edible markers, using a sturdy cookie as your base. Beginners succeed by splitting icing into thick outline and thin flood batches, and by starting with just three tools: an offset spatula, a zip-top bag, and a fine sieve.
- Chill cookie dough 15 to 20 minutes before baking so cookies stay round and even.
- Test flood icing by lifting a spoon; it should sink back into the bowl in about 10 seconds.
- Wet-on-wet marbling only works while icing is shiny, so work one cookie at a time.
- Melted chocolate sets in about 30 minutes, making dipping the lowest-barrier finish.
- Tap the sieve gently and lift stencils straight up for sharp, clean edges.
Table of Contents
- Easy Ways to Decorate Gourmet Cookies for Beginners
- Easy Ways to Decorate Gourmet Cookies With Icing
- Easy Ways to Decorate Gourmet Cookies Without Royal Icing
- Easy Ways to Decorate Gourmet Cookies Without Icing
- Stencils, Dusting, and Edible Markers for a Professional Finish
- Troubleshooting Air Bubbles, Cracking, and Drying Time
- Time-Saving Shortcuts and Budget-Friendly DIY Tools
- Pick Your Cookie Mix and Start Decorating
- Frequently Asked Questions
Easy Ways to Decorate Gourmet Cookies for Beginners
Decorating gourmet cookies at home starts with one rule: pick a sturdy cookie and keep your tools simple. Beginners tend to succeed when they focus on three basics: a cookie that holds its shape, icing at the right thickness, and a surface that will not crack under a heavy hand.
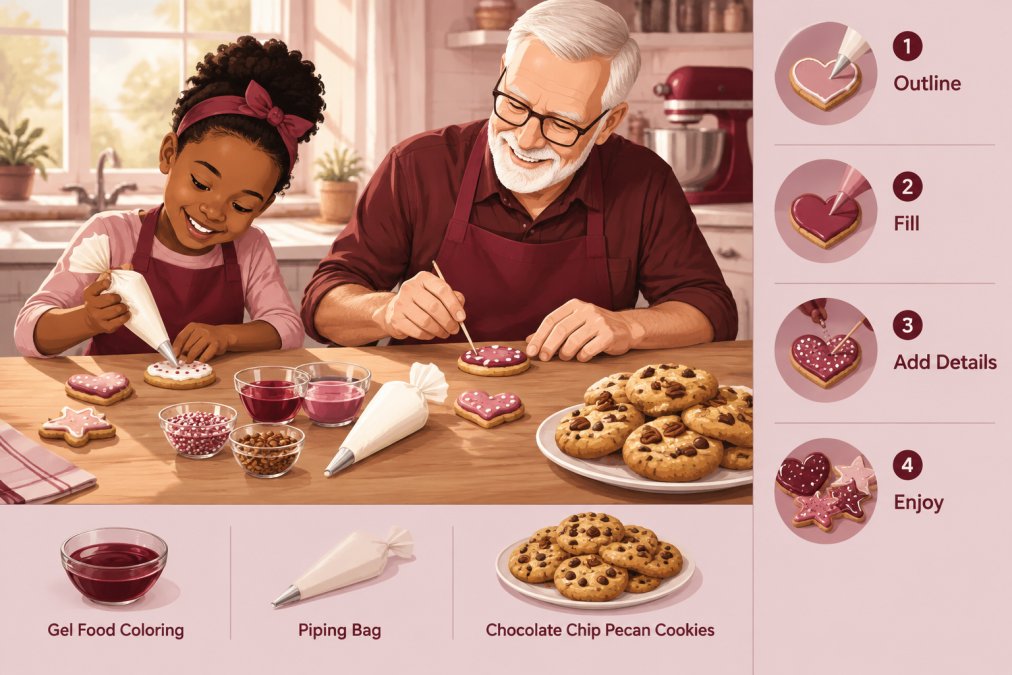
You do not need a pastry certificate to make cookies that look bakery-made. Below, we walk through every method, from icing to stencils to edible markers, so you can pick the one that fits your kitchen and skill level.
Start With a Cookie That Holds Its Shape
The best decorating cookie is flat, firm, and slightly crisp at the edge. Soft, cakey cookies crumble under icing and lose their shape fast. A sugar cookie or a shortbread-style base gives you a clean canvas that will not bend when you pick it up.
If you are choosing a mix for decorating, look for one that bakes up with structure. Our guide to the best gourmet cookie mixes for home baking compares options by texture and ease of prep.
One insider note: chill your dough for 15 to 20 minutes before baking. Cold dough spreads less, so your cookies stay round and even. That one step saves a lot of decorating headaches.
The Three-Tool Starter Kit
You can decorate beautiful cookies with three tools and nothing else:
- A small offset spatula for spreading icing
- A zip-top bag as a stand-in piping bag
- A fine sieve for dusting powdered sugar
That is it. Skip the full piping set until you know you love the craft. Most beginners quit because they bought too much gear before their first batch.
Easy Ways to Decorate Gourmet Cookies With Icing
Icing is a classic path, and it is easier than it looks once you understand consistency.
The trick most guides skip: make one batch, then split it. Keep one bowl thick for outlines and thin the other for flooding. That way you never ruin a whole batch by over-thinning.
Getting Royal Icing to Flood Consistency
Flood consistency is icing thin enough to spread flat on its own but thick enough to stay inside your outline. Test it by lifting a spoon.
If it holds a peak, it is too thick, add water by the half-teaspoon. If it runs off the spoon too fast, add a spoon of confectioners sugar.
Pipe your outline first with stiff icing, let it set a few minutes, then flood the center. This two-step method keeps edges clean and stops icing from running off the cookie. Work in sections of six to eight cookies.
Watch out: adding water to a whole batch at once is the most common way beginners ruin a tray, always thin a portion, never the full bowl.
Wet-on-Wet Marbling and Polka Dots
Marbling is the fastest way to look like a pro. Flood your cookie with one color, then drop small dots of a second color into the wet icing. Drag a toothpick through the dots in zigzag patterns or swirls. The colors blend on their own.
Polka dots work the same way. Flood the base, then add evenly spaced dots of a contrasting color while the surface is still wet. They settle into perfect circles as the icing dries.
This wet-on-wet technique only works while the icing is shiny. Once a crust forms, the colors will not blend. Work one cookie at a time and keep your bowls covered.
A Low-Barrier Icing Setup for Beginners
You do not need a full piping set for clean icing lines. A zip-top bag with a corner snipped to about 1/8 inch gives you a disposable nozzle for outlines and dots. A small offset spatula spreads flood icing into corners faster than a bag, and a fine sieve handles the powdered-sugar finish.
Start with one drop on a toothpick, mix, and add more only after you check the shade.
If you are decorating with kids or a mixed-age group, pre-fill several bags with different colors and set them in cups, corner down, so the icing does not leak.
Easy Ways to Decorate Gourmet Cookies Without Royal Icing
Not everyone wants to whip up royal icing, and that is fine. You can get a polished look with buttercream, melted chocolate, or a simple glaze made from confectioners sugar and a splash of vanilla. Each behaves differently, so match the method to your goal.
Here is a quick comparison to help you choose:
| Method | Best For | Drying Time | Skill Level |
|---|---|---|---|
| Royal icing | Fine detail, flooding | 6-8 hours | Beginner to intermediate |
| Buttercream | Swirls, texture | 1-2 hours | Beginner |
| Melted chocolate | Dipping, drizzle | 30 minutes | Beginner |
| Simple glaze | Smooth base, dusting | 1-2 hours | Beginner |
Dipping and Drizzling With Melted Chocolate
Dipping is the lowest-barrier finish there is. Melt chocolate in short bursts in the microwave, stirring every 20 to 30 seconds, or over a bowl set above barely simmering water. Stop when most of it is melted and stir the rest smooth, overheated chocolate turns grainy and dull.
Hold a cooled cookie by the edge and dip half into the chocolate, let the excess drip back, then set it on parchment. For a drizzle, spoon chocolate into a zip-top bag, snip a tiny corner, and sweep back and forth.
Watch out: any moisture in the bowl or on the cookie will seize melted chocolate into a stiff paste, dry your tools and let cookies cool completely first.
Buttercream Swirls Without a Piping Set
Buttercream is forgiving because it holds shape and can be re-smoothed if you slip. A zip-top bag with a star tip dropped in, or a simple snipped corner, gives you swirls and rosettes without a full set. Pipe a tight spiral from the outside in, then pull up at the center for a peak.
Buttercream softens as it warms, so keep the bag cool and work in batches. If a swirl slumps, chill the cookie for a few minutes and the shape will set.
Dietary-Specific Decorating
Most guides assume standard royal icing, but a few swaps open the craft to more kitchens. Natural colors, spirulina for green, beet powder for pink, turmeric for yellow, tint without gel dyes. For gluten-free cookies, the decorating methods here are unchanged.
The Cheat-Method Mindset
If piping intimidates you, lean on non-piping finishes: dipping, marbling, edible markers, and stencils. These methods skip the bag almost entirely and still look gift-worthy. The point is a finished tray you are proud of, not a technique badge.
Easy Ways to Decorate Gourmet Cookies Without Icing
No icing at all? Dusting, stenciling, and edible markers can turn a plain cookie into something gift-worthy. These methods suit anyone watching sugar intake or working with a dietary restriction, and they are the fastest routes to a finished tray.
Powdered sugar dusting is the simplest. Lay a stencil on a cooled cookie and sift confectioners sugar over it. Lift the stencil straight up to keep the edges sharp. Cocoa powder works the same way for a darker contrast.
Edible markers let you draw directly on a firm cookie or on set icing. They are perfect for names, dates, and simple line art. Kids love them because there is no drying time and no mess.
Stencils, Dusting, and Edible Markers for a Professional Finish
A professional finish comes down to small details, not expensive tools. Sharp stencil edges, even dusting, and steady marker lines do more than any fancy nozzle. Our gifts and accessories collection includes finishing tools from sifters to decorating sets.
Three habits separate clean work from messy work:
- Tap the sieve gently instead of shaking it
- Lift stencils straight up, never slide them
- Let icing dry fully before adding markers on top
A common mistake is dusting too much at once. Build thin layers. You can always add more powder, but you cannot take it back.
Troubleshooting Air Bubbles, Cracking, and Drying Time
Air bubbles, cracks, and slow drying are the three problems beginners ask about most. Each has a simple fix, and none means your batch is ruined.
Air bubbles happen when you whip too much air into the icing or drag the spatula too fast. Tap the cookie gently on the counter after flooding.
Cracking usually comes from icing that dried too fast or sat too thick. Keep your workspace out of direct sun.
Slow drying points to humidity or icing that is too thin. Run a fan on low nearby, or let cookies sit overnight.
If your cookies themselves come out dry or crumbly before you even start decorating, our guide on why cookies come out dry walks through the real causes and fixes.
Time-Saving Shortcuts and Budget-Friendly DIY Tools
You can save hours with a few cheap workarounds. These are the shortcuts we reach for when a tray is due tomorrow.
- Use zip-top bags instead of piping bags. Snip a tiny corner and you have a free, disposable nozzle.
- Make a DIY drying rack from a cooling rack set over parchment paper.
- Buy gel food coloring, not liquid. A little goes far, so one bottle lasts many batches.
- Skip the stand mixer for small batches and stir by hand.
- Freeze decorated cookies ahead of time. Our guide on how to store pre baked cookies covers containers and freezing tips so they stay fresh.
The biggest time saver is batching your work. Bake all your cookies first, then decorate them in one sitting.
Watch out: do not stack freshly decorated cookies to save counter space. Even slightly tacky icing will smudge and ruin the finish.
Pick Your Cookie Mix and Start Decorating
The best decorating method is the one you will actually finish. Start with one technique, master it, then add another. A sturdy cookie, icing at the right consistency, and a few simple tools will carry you further than any expensive kit.
Browse our cookie mixes to find a base that bakes up firm and even, ready for icing, stencils, or markers. With a good cookie under your hand, the decorating part becomes the fun part.
Decorating gourmet cookies should feel like play, not pressure. That is why we make mixes that take the guesswork out of the bake, so you can spend your energy on the fun part.
Frequently Asked Questions
How do you decorate cookies like a professional without special equipment?
Start with a smooth, fully cooled cookie and a simple outline-and-flood approach using a zip-top bag with the corner snipped off. Let the base layer dry for at least 30 minutes before adding details. A small offset spatula and a sifter for confectioners sugar do most of the work. Keeping your gel food coloring to two or three shades and repeating one motif, like polka dots or a zigzag pattern, reads as intentional rather than messy.
What are easy ways to decorate gourmet cookies without royal icing?
A dusting of cocoa or confectioners sugar through a stencil gives a clean pattern in seconds. Edible markers work well on a plain glazed or bare cookie, and a drizzle of caramel or melted white chocolate adds a bakery-style finish without any piping skill.
What are easy ways to decorate cookies without icing at all?
A light dusting of confectioners sugar through a paper stencil creates a crisp pattern with no icing involved. You can also sandwich two cookies around a layer of jam or melted chocolate, or use edible markers directly on a cooled, unglazed cookie for names and simple heart decorations.
How can beginners decorate gourmet cookies step by step?
Outline the edge first, fill the center, and tap the cookie gently on the counter to release air bubbles. Let it dry flat for several hours before adding dots or lines. Practice the wet-on-wet technique on one test cookie before committing to the whole batch.
