
Last Updated: November 18, 2026
Quick Summary
Planning a dessert table for parties starts with your guest count, since that number drives how many treats to make and how much table space you need. For a dessert-only party, plan about 4 to 5 pieces per guest, and for dessert after a full dinner, plan 1 to 2. Add one extra batch as insurance.
- Write down your guest count, party type, and start and end times before you shop.
- For a dessert-only open house, plan 4 to 5 pieces per guest; after a full dinner, plan 1 to 2.
- Kids under 10 often take three or four items, so plan 3 to 4 pieces per child.
- Use three heights on the table, with the tallest anchor at the back center.
- Set up the table 30 to 60 minutes before guests arrive and keep spare platters in reserve.
Table of Contents
- Start With Your Guest Count and Party Type
- Choosing a Theme and Color Palette for Your Dessert Table
- How Many Desserts for a Dessert Table
- Planning a Dessert Table for Parties on a Budget
- Simple Dessert Table Setup: Stands, Heights and Layout
- Step-by-Step Planning Template for Your Party Dessert Table
- Bringing Your Dessert Table to Life With Lura's Kitchen Cookies
- Frequently Asked Questions
Start With Your Guest Count and Party Type
Planning a dessert table for parties starts with one number: how many people you expect. Everything else, from how many treats to buy to how much table space you need, flows from that count. Ask yourself who is coming, how long the party runs, and whether guests will eat a full meal first or come for sweets only.
A kids' birthday with 15 children needs a very different table than a backyard wedding for 120 adults. Kids tend to grab more cookies and sweets, while adults often take smaller portions and enjoy a mix of flavors. Write down your guest count, the party type, and the start and end times before you shop.
Once you know the numbers, sort your planning into three simple questions:
- How many guests? Include children, teens, and anyone who may bring a plus-one.
- What kind of party? A casual birthday, a holiday open house, and a formal shower all call for different treats.
- How long will it last? Longer parties mean guests come back for seconds, so plan extra.
A quick glance at your guest list tells you how many batches to plan.
Choosing a Theme and Color Palette for Your Dessert Table
A theme ties the whole table together. It can be a season, a favorite color, a family tradition, or a party motif like "Under the Sea" or "Garden Tea." Pick one idea and let it guide your treat choices, your plates, and your decorations.
Color is the fastest way to make a theme feel real. Choose two or three main colors and one accent shade. Then match your cookies, napkins, and tablecloth to that palette. Many bakers use cookie colors that complement the table linens so the display looks planned rather than random.
Keep these tips in mind when you pick colors:
- Use a base color for the tablecloth or runner.
- Add a main color in the treats and décor.
- Finish with a small accent in ribbons, flowers, or candles.
- Stay with natural tones like cream, gold, and brown for a classic Southern feel.
Golden cookies can fit many palettes because their warm color works with a range of colors. A theme does not have to be fancy. A simple color plan with one clear idea looks more polished than a table with too many competing styles.
How Many Desserts for a Dessert Table
Most dessert table guides stop at "two to three pieces per guest" and leave you to do the math. The number that actually works depends on three things: whether dessert is the meal or follows one, how long guests will graze, and how many different treats you put out. Build your count from those inputs instead of a single flat rule.
Start with a base rate per guest, then adjust:
| Party Type | Role of Dessert | Base Pieces Per Guest | Adjust Up When | Adjust Down When |
|---|---|---|---|---|
| Dessert-only open house | The main food | 4 to 5 | Party runs 3+ hours; evening slot | Morning slot; short 90-minute window |
| Dessert after a full dinner | Sweet finish | 1 to 2 | Plated dinner was light; late-night crowd | Heavy meal; early weekday event |
| Kids' birthday | Snacking throughout | 3 to 4 | Ages 4-10; games and running around | Mixed ages with many adults |
| Bridal or baby shower | Light bites plus sweets | 2 to 3 | Afternoon slot with no lunch | Mid-morning with coffee only |
| Holiday open house | Grazing all day | 3 to 4 | Guests drop in over 4+ hours | Fixed start and end time |
| Potluck or block party | One of many tables | 1 to 2 | Your table is the only dessert | Other sweet tables present |
Base Pieces Per Guest
Worked example, dessert-only party for 40 guests: 40 × 4 = 160 pieces as a floor, 40 × 5 = 200 as a ceiling.
Worked example, dessert after dinner for 60 guests: 60 × 1.5 = 90 pieces. Round to 100 so every tray looks full at the start.
Variety changes the math. A table with six different treats invites guests to try two or three small items, so total pieces run higher than a table with two options.
Watch out: kids under 10 often take three or four items and eat half of each, so a kids' table needs more pieces per child than the adult rate suggests, not fewer.
Divide your total piece count by the number of cookies each batch yields to get your batch number, then add one extra batch as insurance.
Planning a Dessert Table for Parties on a Budget
A dessert table does not have to be expensive. Set a total budget first, then divide it by guest count to find your cost per guest. A cost-per-guest target keeps you honest when choices pile up.
Here are some ways to stretch your money:
-
Bake from a mix. Mixes cut shopping lists and save time, which is money too.
-
**** A big batch of one favorite can cover more guests than several small specialty items.
-
Buy décor you can reuse. Plain cake stands and trays work for many future events.
Compare your options. The Ready-to-gift Teacake Bag is priced at $29.99 and the Madear's Old Fashion Teacakes (baked) are $34.99. You can also weigh our quick dessert recipes against store-bought options for your potluck to see which fits your time and money best.
Write your budget on paper before you shop. Track each purchase against it. This simple step prevents overspending on décor that guests will barely notice.
Simple Dessert Table Setup: Stands, Heights and Layout
Styling advice is everywhere; the part that trips people up is the hour before guests arrive. Treat setup as a short production with a sequence, a packing list, and a traffic plan, and the pretty part takes care of itself.
Build in three tiers. Put the tallest anchor, usually a cake or a tiered stand, at the back center. Flank it with medium stands at roughly two-thirds that height. Keep the front row for low platters and small clusters. The eye should step down from back to front, not jump around.
Balance by weight, not by count. Three small cookies on the left do not balance one large cake on the right. Match visual mass: a tall narrow stand on one side pairs with a wide low platter on the other. Group like treats together, all chocolate chip in one cluster, all teacakes in another, so guests can find a favorite at a glance instead of hunting.
Plan guest flow before you place a single stand. Guests should approach from one side, serve themselves, and exit without crossing back through the line.
Make it reachable for everyone. Keep the treats guests serve themselves within about 48 inches of the floor so shorter guests and guests using wheelchairs can reach.
Setup timeline:
- Night before: Wash and dry all stands, trays, and utensils; iron the tablecloth; pack a labeled bin with stands, platters, labels, tape, scissors, and a lint roller.
- Two hours before: Cover the table, place the backdrop, and set the tallest anchor and medium stands empty so you can adjust spacing.
- 60 to 90 minutes before: Arrange shelf-stable treats (cookies, teacakes, candy) on their platters. Leave gaps for anything that needs to stay cold until the last minute.
- 30 minutes before: Add perishable items, fill in gaps with small clusters, and set plates and utensils at the entry end.
- During the party: Consolidate half-empty platters onto one tray rather than refilling from scratch, and keep one spare platter of each treat in reserve.
Transport and teardown. If you are setting up away from home, arrange treats on platters at home, wrap each platter in plastic wrap, and slide it into a shallow box so nothing shifts in the car.
Step-by-Step Planning Template for Your Party Dessert Table
Use this checklist to plan from start to finish:
- Two weeks before: Confirm guest count and party type.
- Two weeks before: Pick your theme and color palette.
- Two weeks before: Set your total budget and cost-per-guest target.
- One week before: Calculate total desserts using the pieces-per-guest table.
- One week before: Buy mixes, eggs, butter, and décor.
- Three days before: Bake or order desserts and store them correctly.
- Day before: Gather stands, trays, plates, napkins, and tablecloth.
- Day of: Set up the table 30 to 60 minutes before guests arrive.
- Day of: Refill platters during the party and keep a few spares in reserve.
- After the party: Store leftovers in airtight containers and note what sold best for next time.
Follow this order and the table comes together without last-minute scrambling. Add dates to the checklist that fit your party schedule.
Bringing Your Dessert Table to Life With Lura's Kitchen Cookies
Once your guest count, theme, and layout are set, the cookies bring the table to life. Lura's Kitchen cookie mixes are made for home bakers who want homemade treats without a lot of mess. Simply add butter and eggs.
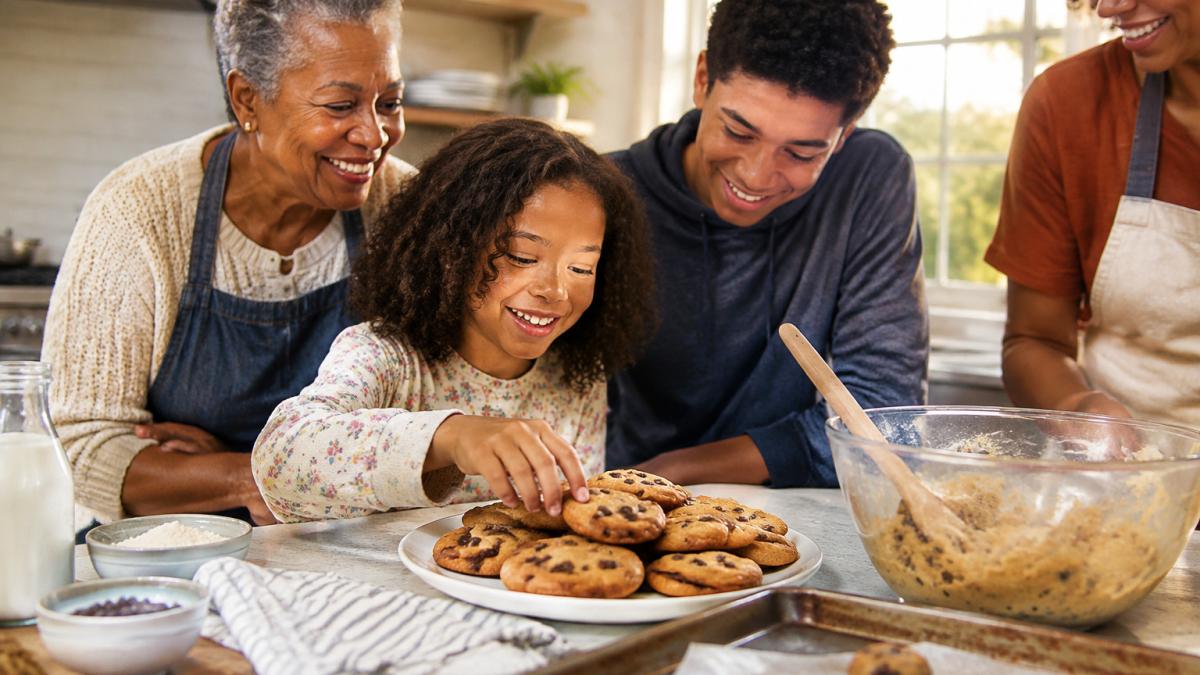
Baking is also a chance to bring the family into the fun. Kids can help stir, scoop, and press chocolate chips into the dough, while grandparents often share a favorite memory of baking together.
Try a few of our favorites on your dessert table:
- Tura Lura's Chocolate Chip Pecan Cookie Mix ($26.99) brings rich chocolate and buttery pecans.
- Langston's No-Nonsense Chocolate Chip Cookie Mix ($24.99) offers classic chocolate chip flavor. Langston's package makes approximately 3 to 4 dozen medium cookies or 2 dozen large cookies.
- Madear's Old Fashion Teacakes ($34.99) add a nostalgic, vanilla and nutmeg touch to any Southern-inspired spread.
Lura's Kitchen is a multi-generational, woman-majority, and minority-owned benefit corporation. Its mixes are built on legacy recipes. When you set out a plate of warm cookies, you are serving a bit of that family story too.
As you plan, keep the whole family in mind. It's all in the mix.
Frequently Asked Questions
How many desserts should be on a dessert table?
A common starting point is about two to three dessert options per 10 guests, with a bit extra if you expect a crowd or want leftovers. Adjust for how long the party runs and whether guests also have a main meal. Choosing two or three cookie varieties and one or two cake or cupcake options usually gives enough variety without overwhelming the table. Plan for one or two servings per guest if the desserts are bite-sized, and fewer if each piece is large.
How far in advance can you set up a dessert table?
Many cookies and bars can be baked one to three days ahead and stored in airtight containers at room temperature. Cupcakes and cakes are usually best baked a day or two before and decorated closer to the party. Set up the table shell, stands and tablecloth the day before, then add the fresh items the morning of the event so everything looks its best and stays fresh.
How do you plan a dessert table on a budget?
Start with a short menu of two or three desserts that you can bake in bulk, such as chocolate chip cookies. Use stands, cake plates and trays you already own, and fill gaps with fresh greenery or seasonal fruit. Limiting the number of unique treats and making duplicates of your best sellers keeps costs predictable.
How do you keep a dessert table easy for guests to navigate?
Place the dessert table where guests can reach it from more than one side, so lines move quickly. Put larger items at the back, arrange smaller treats in front, and leave a clear space for guests to pick up plates and napkins. Label each dessert with a small card so guests with allergies or dietary needs can choose safely.
