

Table of Contents
- Why Consistency Matters in Cookie Baking
- Using a Kitchen Scale for Baking Precision
- Chilling Cookie Dough Benefits and Best Practices
- Oven Temperature Calibration and Hot Spots
- Portioning Dough with a Cookie Scoop
- Sugar Ratios, Texture Control, and Carry-Over Cooking
- Environmental Factors: Humidity, Altitude, and Ambient Temperature
- How to Store Pre-Baked Cookies for Consistency
- Frequently Asked Questions
Last Updated: August 31, 2026
Why Consistency Matters in Cookie Baking
Baking consistent cookies separates casual home bakers from those whose cookies people actually request. The difference isn't luck, it's understanding that cookies are chemistry, and chemistry demands precision.
When you bake consistent cookies, every batch tastes the same, looks the same, and has the same texture. Your chocolate chips distribute evenly. The edges crisp at the right moment. The centers stay chewy without being underbaked. This consistency builds trust and signals quality, whether you're baking for family, gifts, or a fundraiser.
The challenge is that baking happens in an environment full of variables: oven hot spots, seasonal ingredient variations, and shifting measuring habits. The good news is you can control most of these variables through intention, not talent. This guide walks you through the exact systems that make the difference, from weighing ingredients to managing oven temperature to storing dough properly.
Using a Kitchen Scale for Baking Precision
Using a kitchen scale is the single most important step toward consistency. Volume measurements, cups and tablespoons, are unreliable. A cup of flour packed down weighs more than a cup measured loosely. Humidity affects how tightly ingredients settle.
Weight measurements eliminate this problem. When you measure in grams, you're measuring the actual amount of ingredient, not the space it occupies. A recipe calling for 250 grams of flour will always be 250 grams, regardless of how you scoop it.
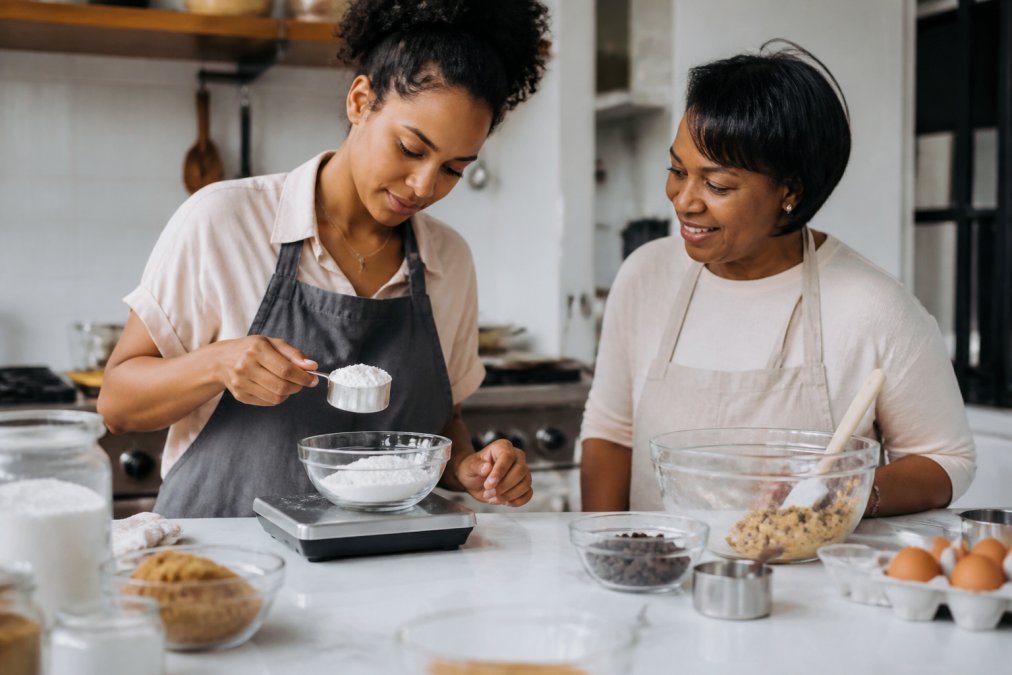
Gram Measurements vs. Volume
A digital kitchen scale accurate to 1 gram gives you consistency that measuring cups cannot match. The difference becomes obvious across batches: a loosely measured cup of flour produces different results than a packed cup. Grams solve this entirely. Invest in a scale with a gram setting and a tare button. Digital scales are inexpensive and accurate enough for home baking.
Standardizing Your Batch Size and Yield
Once you're measuring in grams, standardize your batch size. If a recipe yields 24 cookies, weigh the dough and divide by 24. That's the weight each cookie should be. If you're using a cookie scoop, find one that delivers that exact weight.

A batch that yields 18 large cookies bakes differently than one that yields 30 small cookies. By standardizing your yield and portion size, you remove another variable. Document your standardized recipe with weights, target weight per cookie, and expected yield. This becomes your reference for future baking.
Chilling Cookie Dough Benefits and Best Practices
Chilled dough is the difference between cookies that spread into thin, crispy discs and cookies that hold their shape. 🥶
Cold dough bakes more slowly than room-temperature dough. That slowness gives the structure time to set before the edges spread too far. It allows the centers to bake through while the edges stay chewy. It prevents the sugar from melting too quickly and causing excessive spread.
How Cold Dough Prevents Spread
When dough is cold, the butter stays solid longer. Solid butter doesn't melt into the flour immediately. The dough holds its shape as it goes into the oven. Only after a few minutes, once the structure has set, does the butter start to melt and the cookies begin to spread. By then, the leavening agents have done their work.
Warm dough spreads immediately, resulting in thin, flat cookies with inconsistent texture. Chill your dough for at least 30 minutes. One hour is better. Overnight is ideal if you have the time. The longer the dough chills, the more stable it becomes.
Room Temperature Ingredients and Emulsification
Room-temperature butter creams properly with sugar. Cold butter doesn't incorporate air the same way. Cold eggs don't emulsify with the butter as smoothly. Emulsification, where fat and water combine into a stable mixture, happens best when butter and eggs are both around 70 degrees.
Start with room-temperature butter and eggs. Cream them together until pale and fluffy, usually 2-3 minutes with an electric mixer. Add your dry ingredients and mix until just combined. Then chill the finished dough. You get proper emulsification from warm ingredients and controlled spread from cold dough.
Oven Temperature Calibration and Hot Spots
Most home ovens are off by 10-25 degrees. Some swing wildly, 50 degrees hotter on one side than the other. This is why your cookies bake unevenly. An oven thermometer is non-negotiable if you want consistency.
Using an Oven Thermometer for Accuracy
Place an oven thermometer on the center rack. Preheat your oven to 350 degrees. Wait 15 minutes for it to stabilize. Check the thermometer. If it reads 350, your oven is calibrated correctly. If it reads 340, your oven runs cool and you'll need to bake slightly longer. If it reads 365, your oven runs hot and you'll need to watch your cookies carefully.
Once you know your oven's actual temperature, adjust your baking time accordingly. Check your oven thermometer monthly, as ovens drift over time.
Pan Rotation and Managing Oven Hot Spots
Even a properly calibrated oven has hot spots. The back left corner might be hotter than the front right. The solution is pan rotation. Halfway through baking, rotate your baking sheet 180 degrees. If you're baking two sheets at once, also swap their positions. This ensures all cookies experience the same temperature over the course of baking.
Portioning Dough with a Cookie Scoop
A cookie scoop ensures every cookie is the same size, which means every cookie bakes the same way.

Achieving Uniform Size and Bake Time
When you scoop dough by hand, portions vary. Larger cookies bake longer. Smaller cookies finish first. You end up with a batch where some cookies are perfectly baked and others are underbaked or overdone.
A standardized cookie scoop eliminates this. A 2-ounce scoop delivers exactly 2 ounces of dough every time. All your cookies are the same size and bake for the same amount of time.
Proper Spacing on Baking Sheets
Cookies need room to spread. Space cookies about 2 inches apart. Use parchment paper or a silicone mat to prevent sticking and ensure even heat distribution. Line your baking sheets before you start scooping, and space your cookies before transferring the sheet to the oven. This prevents the dough from warming up while you're portioning, which would cause inconsistent spread.
Sugar Ratios, Texture Control, and Carry-Over Cooking
The ratio of brown sugar to granulated sugar determines texture more than any other ingredient.
Brown Sugar vs. Granulated Sugar Impact
Brown sugar contains molasses, which is hygroscopic and pulls moisture from the air. Cookies made with more brown sugar stay softer and chewier because they retain moisture longer. They also brown more quickly.
Granulated sugar is pure sucrose and doesn't retain moisture the same way. Cookies made with more granulated sugar are crisper and lighter in color.
A typical cookie recipe uses a 1:1 ratio of brown to granulated sugar, creating a balanced cookie that's chewy in the center and slightly crispy at the edges. If you want chewier cookies, increase the brown sugar. If you want crispier cookies, increase the granulated sugar. Document whether you're using light brown sugar or dark brown sugar, as this detail affects the final result.
Golden Brown Centers and Cooling Techniques
Carry-over cooking is real. Your cookies continue to bake after they come out of the oven. Pull your cookies from the oven when the edges are set and golden brown but the centers still look slightly underbaked. They'll firm up to the perfect texture through carry-over cooking.
Let cookies cool on the baking sheet for 2-3 minutes, then move them to a wire rack. The rack allows air to circulate underneath, preventing the bottoms from steaming. If you want crispier cookies, leave them on the baking sheet longer. If you want chewier cookies, move them to the rack sooner.
Environmental Factors: Humidity, Altitude, and Ambient Temperature
Your kitchen's environment affects your dough more than you probably realize.
High-Altitude Baking Adjustments
If you bake at elevation above 3,000 feet, your cookies will behave differently. Water boils at a lower temperature at high altitude, which means liquids in your dough evaporate faster. Leavening agents also work more aggressively.
High-altitude adjustments typically involve reducing leavening by about 25 percent and increasing liquid slightly. You might also reduce sugar slightly. If you bake at high altitude, test your recipe and document your adjustments.
Humidity and Weather Impact on Dough Hydration
Humidity affects how much water your flour absorbs. On humid days, flour is already holding moisture from the air. On dry days, flour is drier. This changes how your dough feels and behaves.
Pay attention to how your dough feels. If it's more humid than usual, add a tablespoon of flour at a time until the dough feels right. If it's drier, add a teaspoon of water or milk. These small adjustments maintain consistency even when the weather changes.
How to Store Pre-Baked Cookies for Consistency
Proper storage determines whether your cookies stay fresh or go stale. Airtight containers keep room-temperature cookies fresh for 3-5 days by preventing moisture from escaping. For longer storage, freeze baked cookies for up to three months. Thaw them at room temperature for about 30 minutes before serving.
You can also freeze dough. Portion your dough using a cookie scoop, freeze the portions on a baking sheet, then transfer them to a freezer bag. Bake directly from frozen, adding 1-2 minutes to the baking time.
| Storage Method | Duration | Best For | Notes |
|---|---|---|---|
| Airtight container (room temp) | 3-5 days | Soft, chewy cookies | Prevents moisture loss |
| Loose container (room temp) | 2-3 days | Crispy cookies | Allows air circulation |
| Freezer (baked) | Up to 3 months | Long-term storage | Thaw 30 minutes before serving |
| Freezer (dough portions) | Up to 3 months | Convenience baking | Bake directly from frozen |
Baking consistent cookies requires systems, not luck. You need precise measurements, temperature control, proper chilling, and attention to your environment.
Start with a kitchen scale and an oven thermometer. Chill your dough. Use a cookie scoop. Rotate your pans halfway through baking. Pay attention to carry-over cooking. These fundamentals eliminate most of the guesswork.
When you're ready to bake, reach for [Lura's Kitchen(/collections/cookie-mixes) premium cookie mixes | luraskitchen.com]. Whether you choose Langston's No-Nonsense Chocolate Chip, Tura Lura's Chocolate Chip Pecan, or Madear's Old Fashion Teacakes, you're starting with a formula that's been tested and refined. The mixes handle the ingredient precision for you. Your job is to follow the systems: measure by weight, chill properly, control your oven temperature, and portion uniformly. It's all in the mix. 🍪
Frequently Asked Questions
How do I get cookies to bake evenly?
Even baking starts with three practices: use a kitchen scale to measure ingredients precisely, portion dough with a cookie scoop for uniform size, and rotate your baking sheet halfway through baking to account for oven hot spots. An oven thermometer ensures your oven temperature is accurate. Spacing cookies 2 inches apart on the sheet and using parchment paper or a silicone mat also promotes even heat circulation and consistent results.
What are the benefits of chilling cookie dough?
Chilling cookie dough for at least 30 minutes (or up to 72 hours) controls spread during baking, prevents cookies from flattening too much, and allows flavors to develop. Cold dough bakes more slowly, giving the leavening agents time to work properly before the edges set. This results in chewy centers with crispy edges and more uniform shape across your entire batch.
Why do my cookies spread differently each time?
Inconsistent spread is usually caused by variations in dough temperature, ingredient measurements, or oven calibration. Room temperature ingredients mix more evenly during the creaming method, which affects emulsification and hydration. Always chill dough to the same temperature, use a kitchen scale for precise measurements, and verify your oven temperature with a thermometer. Humidity and ambient temperature also affect dough consistency, so adjust your recipe slightly on humid days.
What's the best way to store pre-baked cookies?
Store cooled cookies in an airtight container at room temperature for up to 5 days. Keep chewy cookies separate from crispy ones, as moisture migration will soften crispy edges. For longer storage, freeze cookies in an airtight container for up to 3 months. Thaw at room temperature before serving. Avoid storing warm cookies, as trapped steam will create condensation and affect texture.
This article was written using GrandRanker