

Table of Contents
- Why Toddler Chefs Thrive With the Right Tools
- Essential Cutting Tools for Toddler Chefs
- Measuring, Mixing, and Baking Essentials
- How to Teach Toddlers to Bake Safely at Home
- Safety Features to Look for in Toddler Kitchen Tools
- Age-Appropriate Kitchen Tasks and Developmental Milestones
- Storage, Organization, and Cleaning Tips for Kids' Tools
- Frequently Asked Questions
Last Updated: September 26, 2026
Why Toddler Chefs Thrive With the Right Tools
Cooking with a toddler works best when the tools are built for small hands. Child-sized knives, bowls, and utensils let a two- or three-year-old stir, scoop, and spread without constant correction, which is when real learning starts. This guide from Lura's Kitchen covers the essential kitchen tools for toddler chefs, from safe cutting gear to baking sets and storage.
Essential Cutting Tools for Toddler Chefs
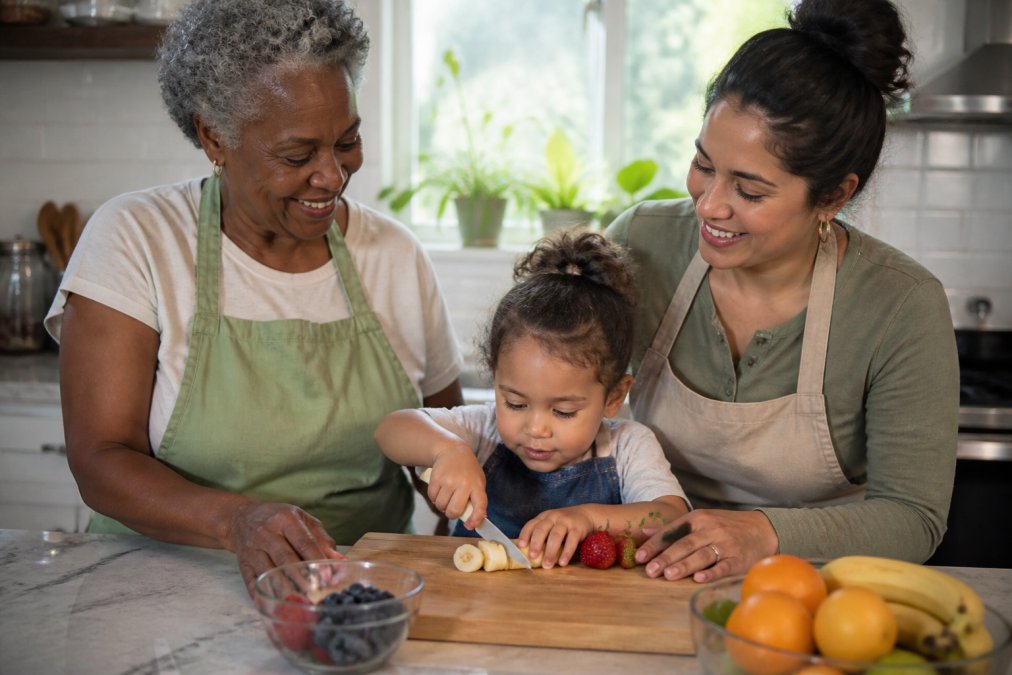
The best cutting tool for a toddler is a blunt-tip nylon knife paired with a small, stable cutting board. A blunt tip means no sharp point near small fingers, and a serrated edge still grips soft foods like bananas, strawberries, and cooked carrots.
Safe Kitchen Knives for Toddlers
Safe kitchen knives for toddlers are lightweight, blunt-tipped, and sized to fit a small palm. Look for a rounded blade, a textured handle, and a length of about 5 to 6 inches. Plastic or nylon blades cut soft produce but won't break skin.
Cutting Boards and Prep Surfaces
A non-slip base is non-negotiable, a board that slides mid-cut is how accidents start. Choose a small board with rubber feet or a silicone edge, set at the child's height so they're pressing down, not reaching up.
Measuring, Mixing, and Baking Essentials
Measuring and mixing tools turn a toddler from spectator into a real prep partner. The goal is a small, closed set a child can hold, control, and put away without help, not a full adult set scaled down.
- Clear liquid measuring cup, 1-cup size. Clear walls let a child see the line and self-correct. A 1-cup cup is light enough to lift one-handed when full.
- Dry measuring spoons, 1/4 tsp through 1 tbsp. Metal spoons with a flat rim level cleanly against the side of a container; round plastic spoons leave a mound that throws off small batches.
- Dry measuring cups, 1/4 cup through 1 cup. Look for a flat top edge and a handle that fits a toddler's whole hand, not just fingers.
- Small balloon whisk, about 8 inches. A shorter whisk gives more control; a long one tips the bowl.
- Silicone spatula, one-piece. A single molded piece has no seam where batter hides, and food-grade silicone won't scratch bowls or melt against a warm pan.
Why Bowl Choice Matters More Than the Whisk
A wide, lightweight bowl beats a heavy ceramic one every time. The bowl should be wide enough that a toddler can rest the whisk against the side and stir a full circle without it moving. If it slides, the child grips harder, the wrist tires, and the session ends in frustration. A silicone ring on the base, or a damp towel underneath, solves this in seconds.
Baking Sets and Cookie Tools for Young Chefs
A workable baking set for a young chef is small: the whisk, the spatula, the measuring spoons, and a cookie scoop. The scoop is the quiet hero, it portions dough evenly, keeps hands out of the bowl, and turns portioning into a repeatable motion a toddler can master in one session. Even portions also bake more consistently than hand-rolled blobs.

A Task a Toddler Can Finish Start to Finish
The tools above are chosen so a child can complete one full job: scoop dough onto a lined tray. That task uses the scoop, the tray, and a steady hand, and it ends with something the child made. Keep the adult on the oven and stovetop, and let the child own the scoop.
Sizing Cheat Sheet
| Tool | Size That Fits a Toddler | Why |
|---|---|---|
| Liquid measuring cup | 1 cup, clear | Light when full; visible measurement line |
| Dry measuring spoons | 1/4 tsp to 1 tbsp, metal | Flat rim levels cleanly |
| Dry measuring cups | 1/4 cup to 1 cup | Handle fits a whole hand |
| Balloon whisk | About 8 inches | Shorter shaft means more control |
| Cookie scoop | #40 or #60 | Portions evenly; keeps hands out of dough |
Balanced weight matters more than most parents expect. A tool that's too heavy tips forward; too light and it skids. Hand a child a whisk or scoop and watch how they hold it. If they're fighting the tool, it's the wrong size, not the wrong child.
How to Teach Toddlers to Bake Safely at Home
Learning how to teach toddlers to bake starts with one rule: the adult owns the oven and stovetop, the child owns the mixing bowl. Set that boundary early and repeat it every session.
Here's a simple sequence that works for most families:
Limited Edition Cookie Scoop →
- Wash hands together and set out every tool before you start.
- Let the child pour and scoop the dry ingredients into the bowl.
- Hand over the whisk or spatula and let them mix and fold.
- Scoop the dough onto the tray together.
- Step back and let the adult handle the oven, then bring the child back for the cool-down and taste test.
Safety Features to Look for in Toddler Kitchen Tools
Safety-first design comes down to five features: a blunt tip, a non-slip base, heat resistance, durable materials, and a lightweight build. A tool missing any one tends to get abandoned or used unsafely.
| Feature | Why It Matters | What to Look For |
|---|---|---|
| Blunt tip | Prevents cuts near small fingers | Rounded nylon or plastic blade |
| Non-slip base | Stops boards and bowls from sliding | Rubber feet or silicone edge |
| Heat resistance | Survives dishwasher and warm food | Silicone rated for high heat |
| Durable materials | Withstands drops and daily use | Thick plastic, stainless steel, food-grade silicone |
| Lightweight build | Lets a toddler control the tool | Fits a small palm without strain |
Age-Appropriate Kitchen Tasks and Developmental Milestones
Match the task to the age and the tools get easier to choose. At 18 months to 2 years, a toddler can dump pre-measured ingredients and stir with help. By 3, they can scoop, pour, and spread with a child-sized tool. Around 4, many kids handle peeling, grating soft items, and chopping soft fruit with a nylon knife.
Storage, Organization, and Cleaning Tips for Kids' Tools
Most guides stop at the tool list. The step they skip decides whether cooking with your toddler becomes a habit or a one-time experiment: where the tools live. If a child has to ask an adult to reach the whisk, the independence you built evaporates the moment the activity ends.
The Independent-Access Setup
The goal is a station a toddler can open, use, and close without help: one low drawer or shelf at or below shoulder height, reserved for their tools only. A dedicated space keeps small items from getting lost, lets the child start and finish alone, and signals that the kitchen is partly theirs.
A workable setup for a small kitchen:
- One low drawer for the knife, board, scoop, whisk, and spatula. A drawer beats a countertop bin because it hides clutter and stays dust-free.
- A shallow drawer organizer or a cutlery tray to keep the knife and scoop from sliding into each other. Cheap, and it stops the daily dig.
- A small stackable bin on the same shelf for measuring cups and spoons if the drawer runs out of room.
- A folded towel stored with the board. It doubles as the non-slip base and as the drying mat.
Cleaning Without Ruining the Tools
- Check the dishwasher safe label before the first wash. Silicone and most nylon tools handle the top rack; wooden boards and wooden-handled tools do not.
- Air-dry wooden boards on edge instead of soaking them. Soaking swells the grain, and a warped board rocks instead of sitting flat, which defeats the whole point of a non-slip base.
- Wipe silicone tools with warm soapy water after each use. Silicone holds onto oils and odors if it sits dirty.
- Inspect the knife edge weekly. A nylon blade that has been chewed or dropped can develop a rough edge that snags food instead of slicing it.
- Dry the scoop's release mechanism if it has one. A spring or lever that stays wet can stiffen.
A Five-Minute Reset Routine
The habit that keeps this working is a short reset after every session. Wipe the tools, return them to the drawer, fold the towel, and close the drawer together with the child. Five minutes, done the same way each time, is what turns a one-off baking afternoon into a routine a toddler can predict and lead. Predictability is what makes a two-year-old willing to put the scoop back instead of carrying it into the living room.
Frequently Asked Questions
What are the best safe cooking tools for a 2-year-old?
For a 2-year-old, start with blunt-tip nylon knives, a small wooden cutting board with a non-slip base, and silicone spatulas. A 2-ounce cookie scoop is also ideal for small hands and helps build hand-eye coordination. Choose tools with an ergonomic grip and lightweight, balanced weight so your toddler can control them. Always supervise closely and pick tools labeled for ages 2 and up.
Are nylon knives safe for toddlers to use?
Yes, nylon knives with serrated edges and a blunt tip are designed specifically for toddlers. They can cut soft foods like bananas, strawberries, and cooked vegetables without cutting skin. Look for a knife with an ergonomic grip and a non-slip handle. Always supervise your child during prep work, and teach them to keep fingers away from the blade edge. These knives build culinary confidence safely.
How do I choose age-appropriate kitchen tools for toddlers?
Match the tool to your child's fine motor skills and kitchen autonomy level. For ages 2-3, choose blunt-tip knives, silicone spatulas, and small whisks. For ages 4-5, add measuring cups, kid-safe peelers, and a cookie scoop. Check for safety-first design: no sharp edges, food-grade silicone, and dishwasher-safe materials. Start with one or two tools and add more as skills grow.
What are the benefits of involving toddlers in the kitchen?
Cooking with toddlers builds fine motor skills, hand-eye coordination, and tactile development through mixing, pouring, and chopping. It also fosters culinary confidence and independent cooking as they master age-appropriate tasks. Children who help in the kitchen are more likely to try new foods. Plus, shared baking creates lasting family memories. Start with simple tasks like whisking or scooping cookie dough.